สำหรับใครที่ต้องการสร้าง rest api จากเริ่มต้น โดยที่สร้างไม่เป็นเลยก็อาจจะค่อนข้างปวดหัวเนื่องจากต้องเรียนรู้กับระบบที่ค่อนข้างเยอะ เพื่อให้สามารถ สร้าง อ่าน เขียน และลบข้อมูลในฐานข้อมูลได้ (Create,Read,Write,Delete หรือ CRUD ) อย่างไรก็ดี ในบทความนี้จะมาสอนวิธีการใช้งาน REST API with WordPress (ที่หลายคนคิดว่าเป็นแค่เป็นระบบที่เอาไว้สร้างเว็บเท่านั้น) เพื่อให้สามารถเชื่อมต่อกับฐานข้อมูล และสามารถ สร้าง อ่าน อัพเดทและลบข้อมูลได้ นอกจากนั้นในบทความนี้ยังมีระบบ Authentication พร้อมกับ Rate limit เพื่อป้องกันการ Request data เกินความจำเป็น
ในขั้นตอนแรกนี้ผมจะทำการติดตั้ง wordpress ใหม่ตั้งแต่ต้นโดยทำการสร้าง subdomain ขึ้นมาใหม่เพื่อให้เห็นภาพได้ชัดเจนโดยจะตั้งชือว่า api.bbxmbb.com ซึ่งถ้าใครใช้โฮสติ้งของ hostinger ก็สามารถสร้างได้ตามนี้เลย
สำหรับใครที่ยังไม่มี host ผมก็แนะนำ hostinger เลย เนื่องจากราคาเริ่มต้นค่อนข้างถูกซื้อพร้อมรวมโดเมนก็ได้ เอาไว้ใช้สำหรับทดลองเล่นคร่าวๆก็ยังโอเค พร้อมทั้งสามารถติดตั้ง wordpress ได้ง่ายมากๆ
- หลังจากเข้ามาในหน้า Dashboard
- คลิ๊กคำว่า Domains ที่ Sidebar และเลือก Subdomains
- ในที่นี้ผมจะตั้งชื่อว่า api จากนั้นก็คลิ๊ก Create
- เมื่อสร้างเสร็จกลับไปที่หน้า Dashboard ของเรา
- ทางฝั่งขวาบนเลือก submain ที่เราเพิ่งสร้างเมื่อสักครู่ ซึ่งก็คือ api.bbxmbb.com
- จากนั้นกดติดตั้ง WordPress
- ตั้งชื่อและ email หลักของ wordpress และกด install
- รอให้ระบบทำการติดตั้งสักครู่ไม่เกิน 5 นาที เพียงเท่านี้เราก็จะได้ WordPress ที่มี Domain เป็น api.bbxmbb.com มาใช้งานเป็นที่เรียบร้อย
ทดสอบการใช้งาน REST API with WordPress ผ่าน Postman
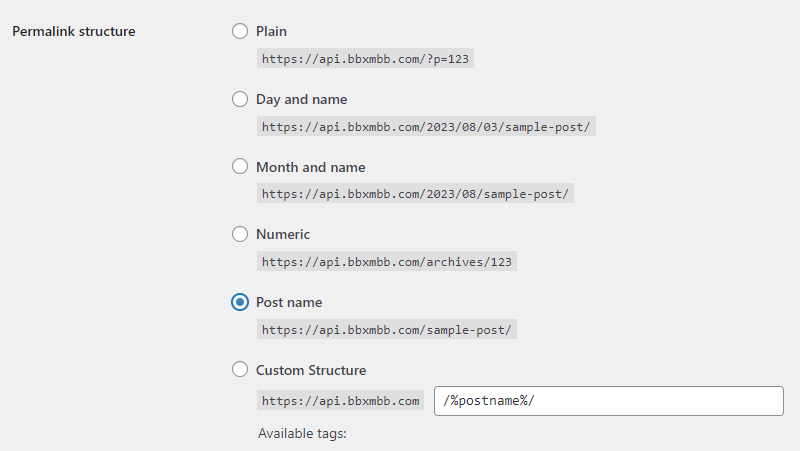
ตั้งค่า Permalink
หลังจากที่ได้ติดตั้ง wordpress เรียบร้อยแล้ว ให้เข้าไปตั้งค่าที่ wordpress->Settings->Permalink และเปลี่ยน Permalink structure ดังรูปเพื่อให้สามารถเข้าถึง Path ได้ตามปกติ
เราก็สามารถเช็ค posts ที่อยู่ใน wordpress โดยผ่านลิ้งนี้ได้เลย
https://<your-website>/wp-json/wp/v2/posts
โดยให้เปลี่ยน <your-website> เป็นโดเมนของผู้ผ่านในที่นี้ก็จะเป็น api.bbxmbb.com จากนั้นเราลองมาดูที่ postman กันต่อดีกว่า สำหรับใครที่ยังไม่รู้จัก postman ก็สามารถเข้าไปอ่านเพิ่มเติมได้ที่
ทดสอบ REST API with wordpress ผ่าน Postman
- เข้ามาหน้าหลัก Postman
- สร้าง Collections ใหม่เพื่อไม่ให้เกิดความสับสน
- คลิกปุ่ม New แล้วเลือก http
- วาง url เมื่อสักครู่ https://<your-website>/wp-json/wp/v2/posts
- จากนั้นกด Send ก็จะเห็น response จากทาง WordPress โชว์โพสที่ถูกสร้างไว้อัตโนมัติตอนติดตั้ง WordPress นั้นเอง
อย่างไรก็ดี ตัว wordpress เองก็มีระบบกันไม่สามารถให้คนอื่นสามารถมา post data ได้ ซึ่งเมื่อลอง post แล้วก็จะขึ้น error ตามนี้
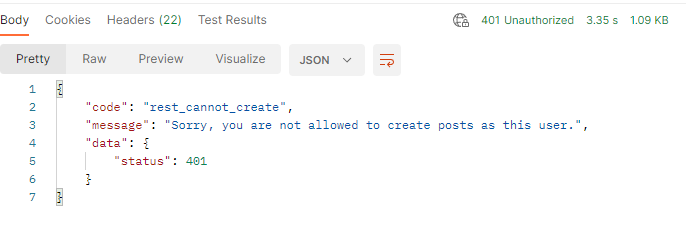
จึงมีปลั๊กอินช่วยอีกตัวซึ่งทำให้ชีวิตสบายขึ้นมาก นั้นก็คือ “WordPress REST API Authentication”
เพิ่ม Authentication ด้วย Plugin “WordPress REST API Authentication”
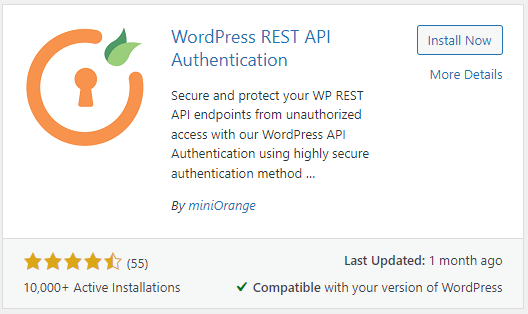
ปลั๊กอินตัวนี้มีฟีเจอร์ให้ใช้ฟรีอยู่ 2 อย่างคือ Basic Authentication และ JWT Authentication ซึ่งถ้าไม่ได้ใช้ในงานที่ซับซ้อนก็ถือว่าโอเคระดับนึง
ในบทความนี้จะยกตัวอย่างโดยการใช้ Basic Authentication เป็นหลัก
ตั้งค่า Basic Authentication เพื่อใช้งาน REST API with wordpress
- ปลั๊กอินและเลือกที่ Configure Methods
- คลิ๊ก Basic Authentication และเลือก username & password with Base64 Encoding จากนั้นคลิ๊ก Next
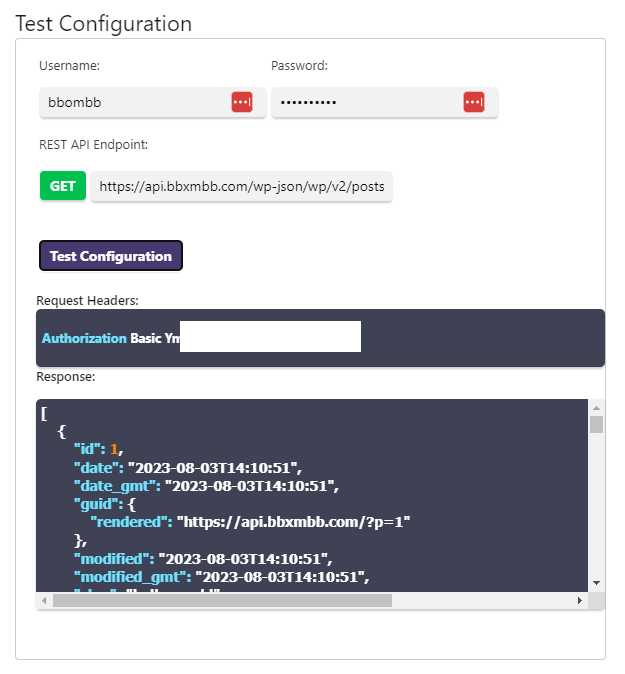
- จะเห็นหน้าต่าง Test Configuration ที่เราใช้สร้าง WordPress เมื่อข้างต้นมา
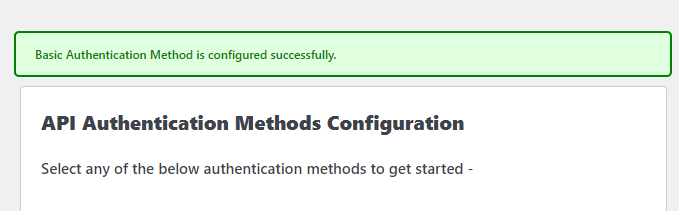
- กด Test Configuration ถ้าหากเราใส่ username และ password ถูกตัวปลั๊กอินก็จะแสดงดังรูปภาพ หากใส่ผิดตัวปลั๊กอินจะขึ้น Error
- จากนั้นกดยืนยัน (สำคัญ หากเราไม่ยืนยัน ถือว่าตัว wordpress เรายังไม่มี Authentication )
ทดสอบ Post, Put and Delete ด้วย Basic Authentication
Post Method
- ไปที่ postman
- เลือกเป็น Post Method
- เลือก Header Tab และป้อนค่า Authentication ไปที่ Key Column
- ส่วน Value Column ให้ใส่ Basic <your base64 enconding> (โค้ดที่ถูกสร้างขึ้นมาเมื่อครู่นี้)
- ในส่วนของ body เปลี่ยนไปที่ raw และคลิก dropdown ให้เป็น JSON และใส่ค่าดังนี้
{
    "title":"Hello from postman"
}
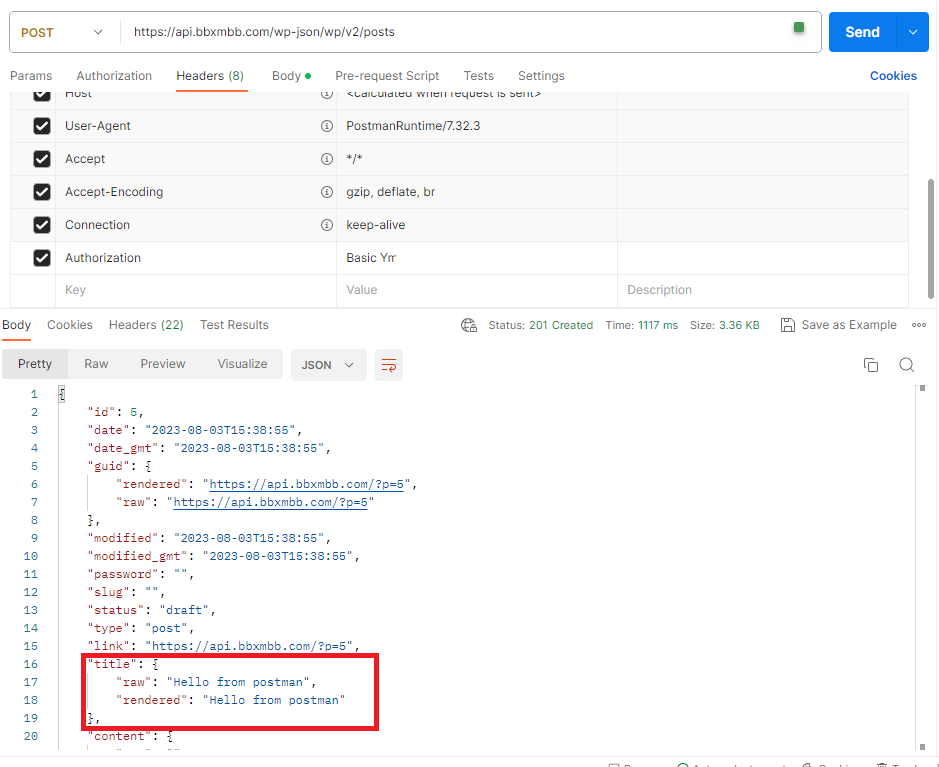
ซึ่งก็จะเห็นการตอบกลับจากฝั่ง wordpress ว่ามีการสร้าง post เป็นที่เรียบร้อย
จากนั้นเรามาลองทำการอัพเดทค่า และลบ post (Put and Delete Methods) โดยใช้ url นี้
https://<your-domain>/wp-json/wp/v2/posts/<id>
Put method
- ใส่ domain ของผู้อ่าน และ id ที่ต้องการจะเปลี่ยนแปลงค่าในที่นี้ id=5
- ทดลองการเปลี่ยน title เป็น “Update from Postman”
- เปลี่ยน Get Method เป็น Put Method จากนั้นคลิ๊ก Send ได้ผลลัพธ์ตามรูปที่ 1
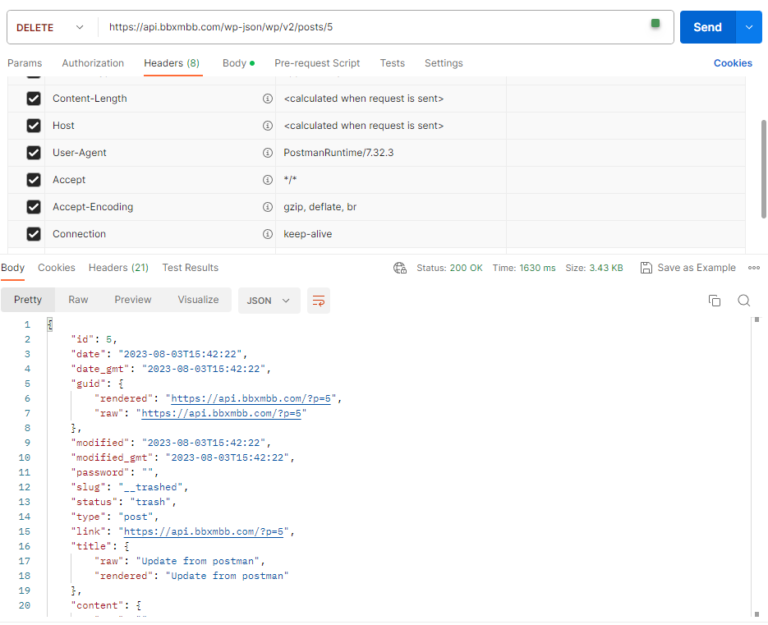
Delete method
- ใส่ domain ของผู้อ่าน และ id ที่ต้องการลบ ในที่นี้ id=5
- เปลี่ยน Put Method เป็น Delete Method จากนั้นคลิ๊ก Send ได้ผลลัพธ์ตามรูปที่ 2

เพียงเท่านี้ก็สามารถใช้งาน rest api กับโปรเจคง่ายๆต่างๆได้เรียบร้อย
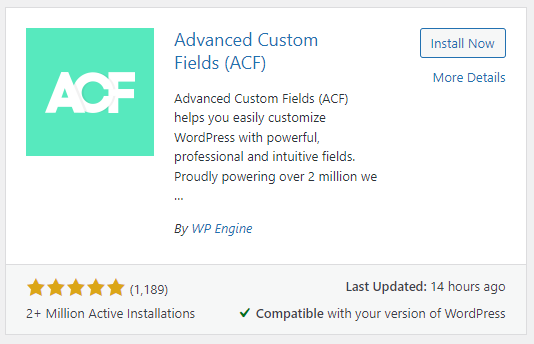
เพิ่ม Custom fields ด้วย Plugin “Advance Custom Fields (ACF)”
เนื่องจากโดยปกติแล้วตัว wordpress ใน Post type ธรรมดา อาจจะไม่เพียงพอต่อการใช้งาน เนื่องจากอยากดึงค่าที่เฉพาะมากกว่านี้มาใช้งาน ซึ่งต้องบอกว่าตัว wordpress นี้ก็สามารถทำได้เช่นกัน โดยต้องติดตั้ง ปลั๊กอินที่ชื่อว่า Advance Custom fields (ACF) เพิ่มเติม
ปลั๊กอินตัวนี้สามารถทำให้เราสร้าง Custom Post Type และ Custom Fields ตามที่เราอยากจะดึงค่ามาได้เลย สะดวกมากๆ
ที่นี้เรามาดูวิธีการใช้งานในการสร้าง Customs post type คร่าวๆกันเลยดีกว่า
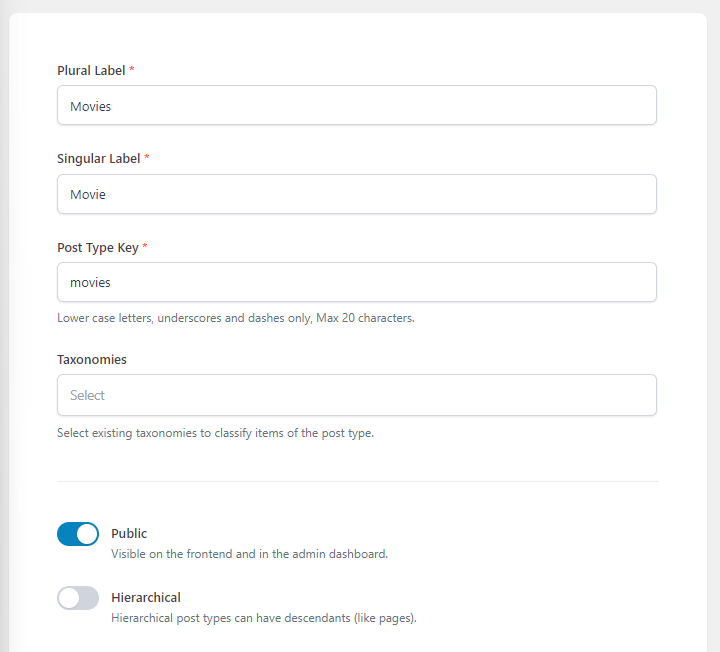
หลังจาก Activate Plugin แล้วในแทบ sidebar ก็จะเห็น ACF เมนู สามารถคลิ๊กเข้าไปเพิ่ม สร้าง Post Type ใหม่ก่อนในที่นี้จะจำลองให้เป็น Movies สามารถตั้งตามตัวอย่างนี้ได้เลย
สร้าง Post Type ใหม่
- คลิ๊กที่ ACF ที่อยู่ตรง sidebar
- เพิ่ม Add New ใน Post Types (รูปที่ 1)
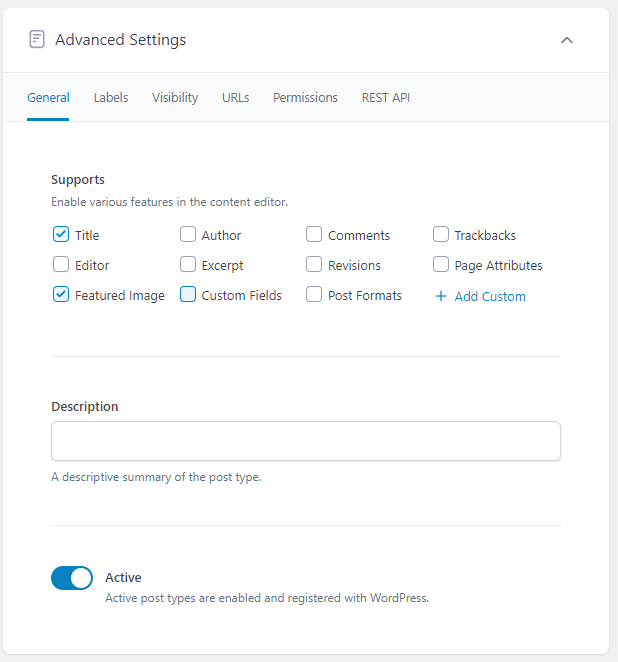
- กรอกข้อมูลตามรูปที่ 2
- ปิดการใช้งาน Editor เนื่องจากเราจะสร้าง Fields ขึ้นมาใช้ใหม่เอง (รูปที่ 3) จากนั้นกด Save
- เราก็จะได้ Custom Post Type ที่ชื่อ ว่า movie เรียบร้อย
สร้าง Field Groups ใหม่
- คลิ๊กที่ ACF ที่อยู่ตรง sidebar
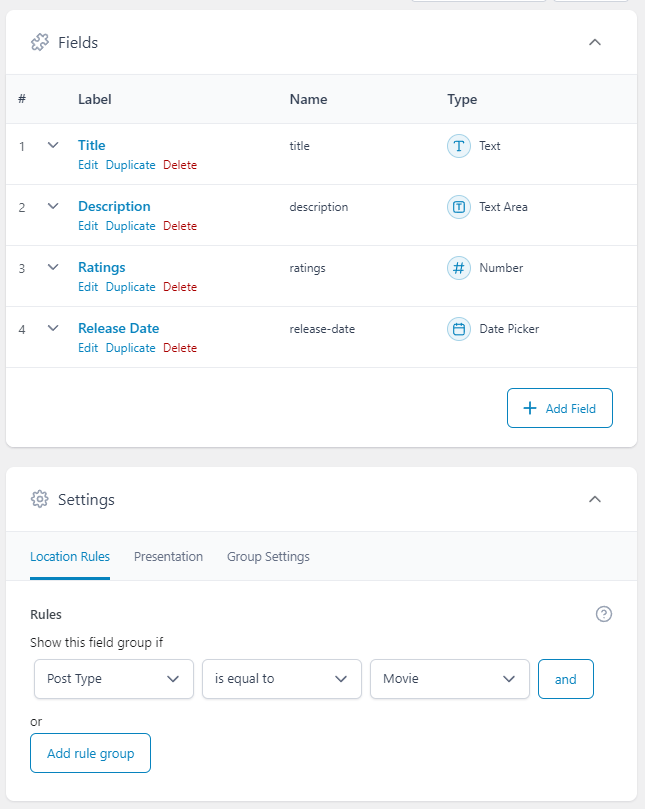
- คลิ๊ก Add New ใน Field Groups และตั้งค่าตามรูปที่ 4 เลือกให้ Field Group นี้ไปเชื่อมกับ Movie Post Type
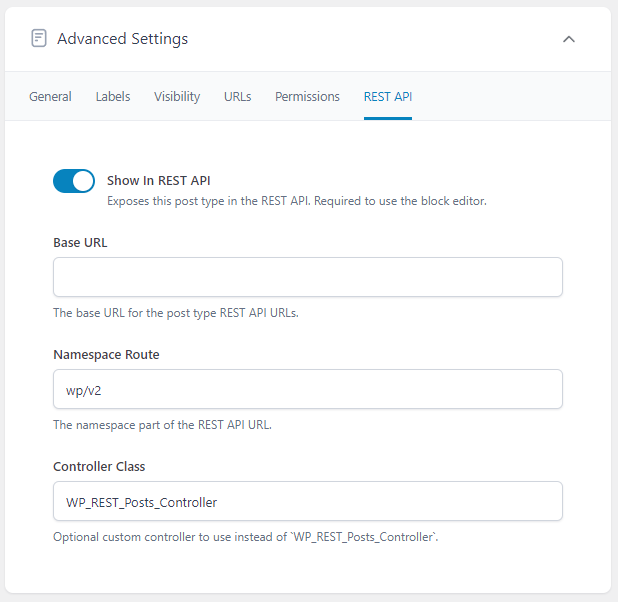
- สำคัญ ตั้งค่า Field Group ที่เพิ่งสร้างเพิ่มเติมโดยไปเปิด Show in REST API ด้วย ไม่เช่นนั้นเราจะไม่เห็นค่า (รูปที่ 5)
- กด Save Changes เพียงเท่านี้เราก็จะได้ Post type ที่ มี Custom fields ตามที่เราต้องการแล้ว

จากนั้นมามาเพิ่มค่าใหม่ดังรูป ใน Movie Post Type
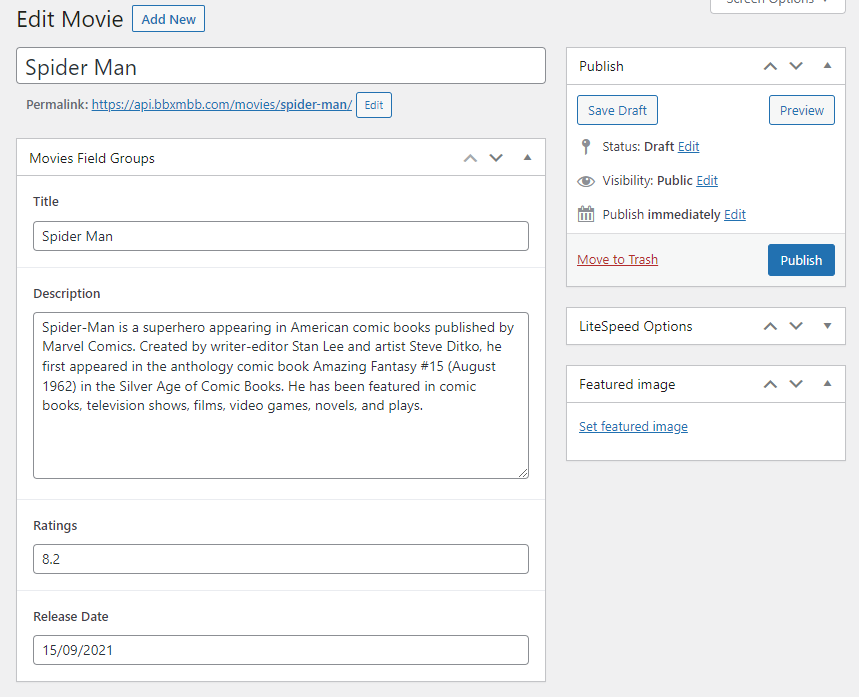
ที่นี้ก็กดสร้างได้เลย หลังจากนั้นเราก็ลองไปทดสอบ GET method ใน Postman เช่นเคย
สำคัญ!
- ปรับ ค่าให้ post type ที่เราเพิ่งสร้างขึ้นมาใหม่ เปิดใช้งาน Authentication ด้วยใน Api Authentication sidebar menu-> Protected REST APIs
- หา Post type ที่เราเพิ่งสร้างขึ้นมาและเปิดใช้งานจากนั้นกด save ได้เลย
ทดสอบ Request data จาก New Post Type
เข้ามาใน postman ใส่ url ดังนี้
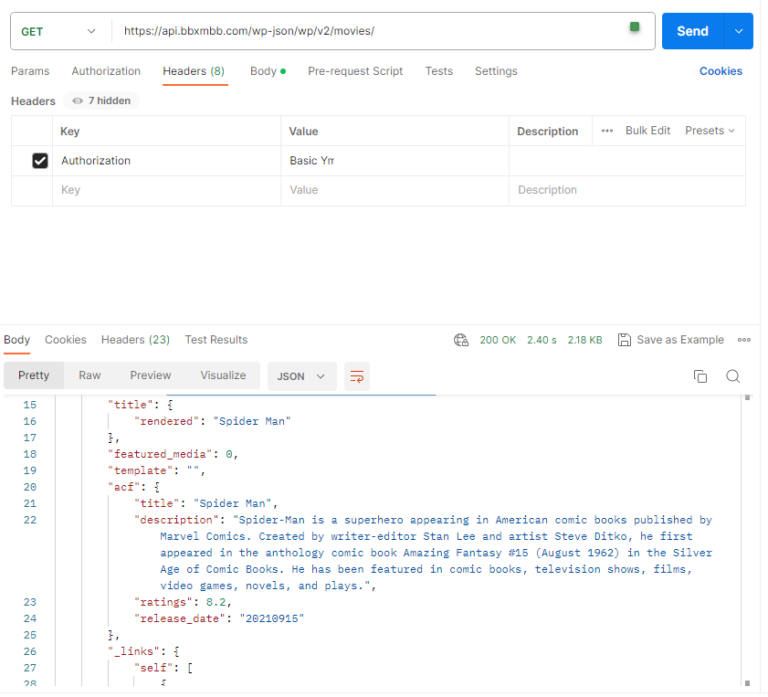
Get Method (รูปที่ 1)
- เปลี่ยน Resquest Method เป็น Get Method
- ใส่ url ดังนี้ https://<your-domain>/wp-json/wp/v2/movies/
- จากนั้น คลิ๊ก Send ก็จะเห็น Response เป็นค่าที่เราเพิ่งป้อนเข้าไป ซึ่งจะไปอยู่ใน Key “acf”
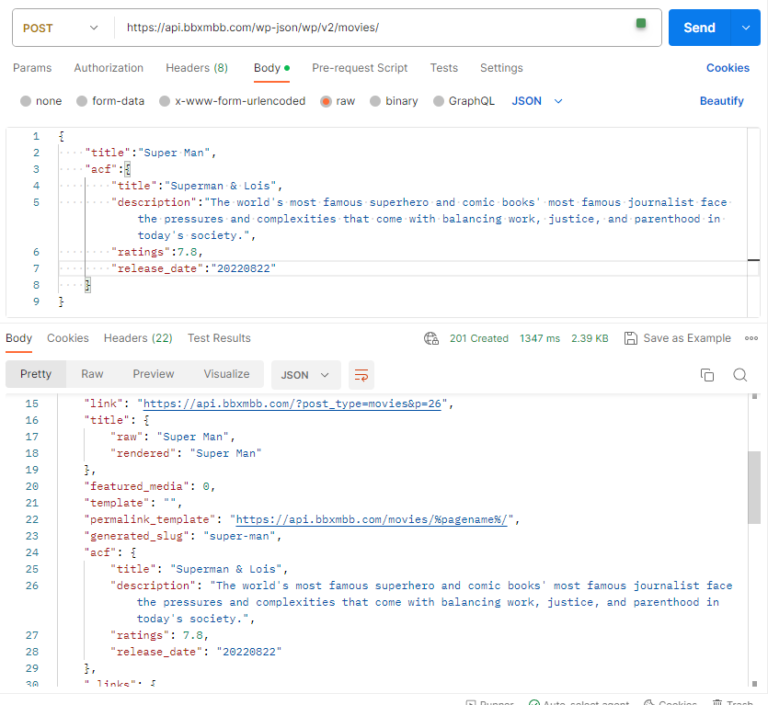
Post Method (รูปที่ 2)
- เปลี่ยน Resquest Method เป็น Post Method
- ใส่ url ดังนี้ https://<your-domain>/wp-json/wp/v2/movies/
- ป้อนค่าเข้าไปใน “acf” ดังรูปที่ 2
- จากนั้น คลิ๊ก Send ก็จะเห็น Response ซึ่งเราจะได้โพส Movie ใหม่เป็นค่าที่เราใส่ไป
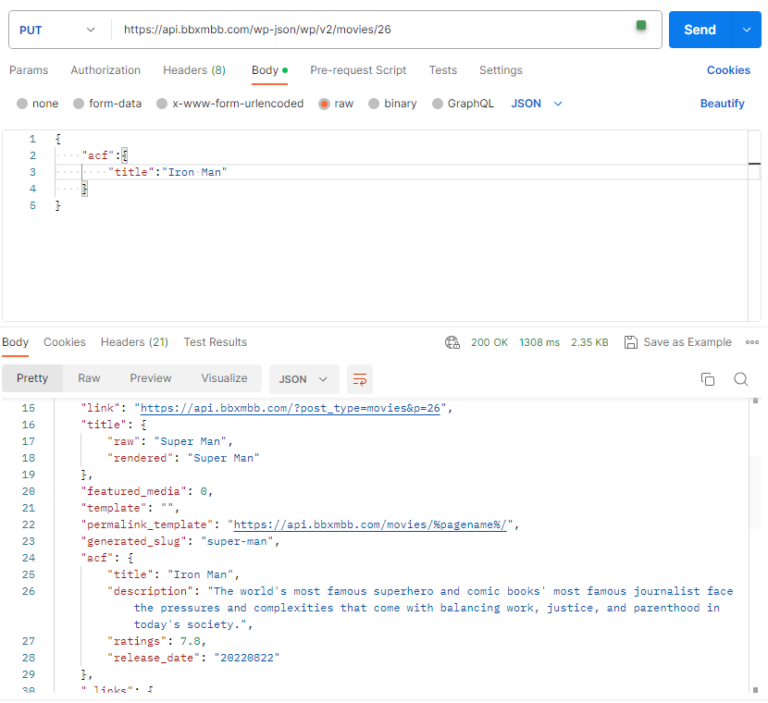
Put Method (รูปที่ 3)
- เปลี่ยน Resquest Method เป็น Put Method
- ใส่ url ดังนี้ https://<your-domain>/wp-json/wp/v2/movies/<id> ในที่นี้ใส่ id เป็น 26
- ทดลองเปลี่ยนค่า title จาก super man เป็น Iron Man ดังรูปที่ 3
- จากนั้น คลิ๊ก Send ก็จะเห็น Response ซึ่ง Title ใน id ที่ 26 ก็จะถูกเปลี่ยนเป็น Iron Man
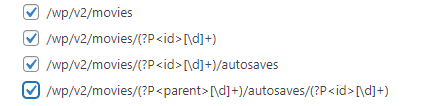
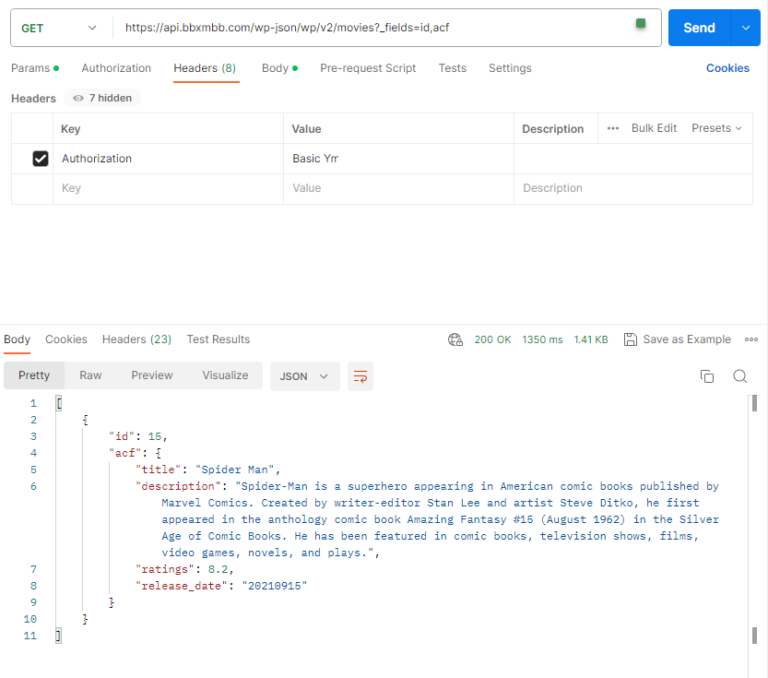
Get Method with request custom fields (รูปที่ 4)
- ผู้อ่านบางท่านอาจจะต้องการดึงแค่ค่าเฉพาะบางค่ามาแสดงเท่านั้นก็สามารถใส่ url ได้ดังนี้เลย ในที่นี้อต้องการให้โชว์เพียง id และ acf เท่านั้น
- https://<your-domain>/wp-json/wp/v2/movies?_fields=id,acf
- ผลลัพธ์ที่ได้ก็จะถูกแสดงเพียง id และ acf ในแต่ละ movie post type ดังรูปที่ 4 นั้นเอง
เพื่อนๆสามารถหาข้อมูลเพิ่มเติมเพื่อ query ข้อมูลจาก wordpress เพิ่มเติมได้ที่ document ของ wordpress ตามลิ้งนี้ได้เลย
เพิ่ม Rate limit ใน REST API with wordpress ด้วย Code Snippet Plugin
ตั้งค่า Plugin และเพิ่ม Custom code
บางครั้งเราอาจจะต้องจำกัดการใช้งานของการดึงข้อมูล,สร้าง,อัพเดท และลบ ด้วย ซึ่งผมก็ลองได้หาปลั๊กอินแล้ว แต่หาไม่เจอเลย จึงเขียนค๊ด php ขึ้นมาเองเพื่อจำกัดการใช้งาน โดยเราสามารถใส่โค๊ด php เข้าไปผ่าน ปลั๊กอินที่ชื่อว่า Code Snippet
จากนั้นก็ไปสร้างไฟล์ใหม่โดยใช้โค้ดนี้ได้เลย ซึ่งสามารถใช้งานได้กับทุก post type
// Custom rate-limiting function
function custom_rate_limiting($max_requests = 100, $per_seconds = 3600) {
    $client_ip = $_SERVER['REMOTE_ADDR'];
    $limit_key = 'custom_rate_limit:' . $client_ip;


    $request_count = (int) get_transient($limit_key);

 if ($request_count >= $max_requests) {
        header("HTTP/1.1 429 Too Many Requests");
        header("Retry-After: " . date("Y-m-d H:i:s T",get_transient_expiration_time($limit_key)));
        die("Rate limit exceeded. Please try again later.");
    }

    $request_count++;
    set_transient($limit_key, $request_count, $per_seconds);

    // Add rate-limiting headers to the response
    $remaining_requests = $max_requests - $request_count + 1;
    header("X-RateLimit-Limit: $max_requests");
    header("X-RateLimit-Remaining: $remaining_requests");
    header("X-RateLimit-Reset: " .  date("Y-m-d H:i:s T",time() + $per_seconds));
}

// Add a custom field to the REST API response for all post types
add_action('rest_api_init', function () {

 custom_rate_limiting(3,10 ); // 0 requests per 10 seconds
    // Get all registered post types
    $post_types = get_post_types(array('public' => true), 'objects');

    // Loop through each post type and add
    // the rest_prepare_{post_type} filter, rest_insert and rest_delete
    foreach ($post_types as $post_type) {
        $post_type_slug = $post_type->name;
        add_filter("rest_prepare_{$post_type_slug}", 'custom_prepare_post_type', 10, 3);
  do_action("rest_insert_{$post_type_slug}");
  do_action("rest_delete_{$post_type_slug}");
    }


});
function custom_prepare_post_type($data, $post, $request) {

    // Get custom field data
    $custom_field_value = get_post_meta($post->ID, 'custom_field_name', true);

    // Add the custom field data to the API response
    $data->data['custom_field'] = $custom_field_value;

    return $data;
}
function get_transient_expiration_time($transient_key) {
    $timeout_option_name = '_transient_timeout_' . $transient_key;
    $expiration_timestamp = get_option($timeout_option_name);

    if ($expiration_timestamp) {
        // The expiration time is stored as a Unix timestamp
        // You can convert it to a readable date or compare it with the current time
        return $expiration_timestamp;
    } else {
        // Transient does not exist or has no expiration time (not set or expired)
        return false;
    }
}
จากนั้นก็กด save changes and activate ได้เลย
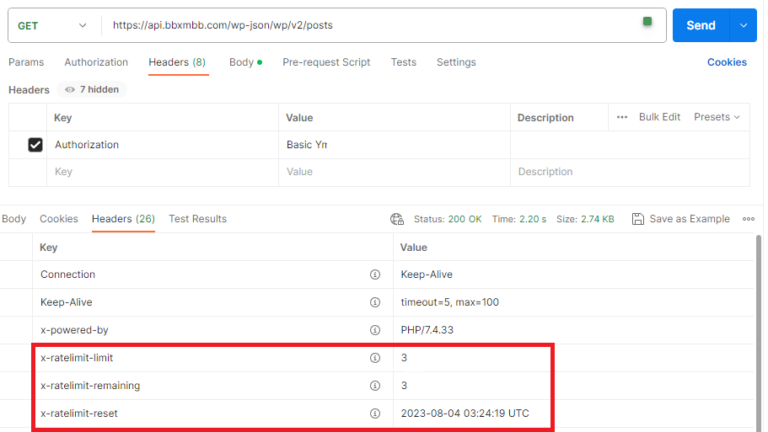
ทดสอบ Rate limit ด้วย Custom code
ทีนี้เรามาลองดูผลลัพธ์กันที่ postman ดีกว่า
ลอง GET Method ดู ก็จะสังเกตเห็น response header ขึ้นโชว์ว่าถูกจำกัดกี่ครั้ง ในตัวอย่างนี้ผมได้ตั้งค่า maximum request อยู่ที่ 3 ครั้งต่อ 10 วินาที หมายถึงทุก 10 วินาที การ request count จะถูก reset และสามารถ request ค่าใหม่มาได้ เพื่อให้งานต่อการแสดงตัวอย่าง ซึ่งผู้อ่านสามารถไปปรับเปลี่ยนได้ที่ custom_rate_limiting($max_requests,$per_second) ได้เลย โดย $max_requests คือจำนวนการ request สูงสุดภายในช่วงเวลา $per_second ฟังก์ชั่นนี้มีค่าพื้นฐานอยู่ที่ 100 ครั้งต่อ 60 นาที
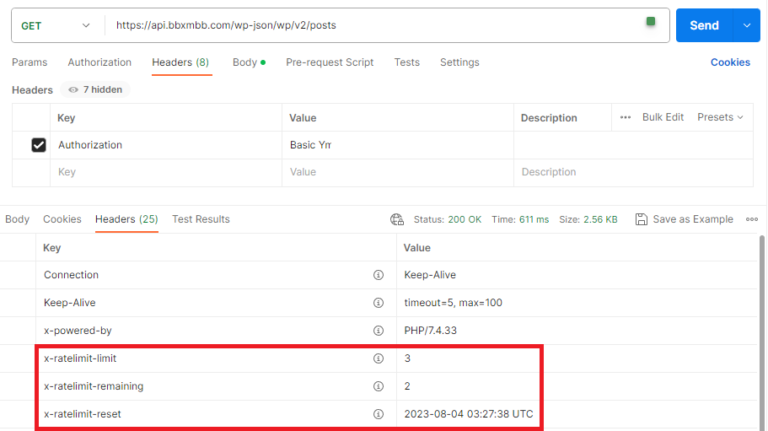
ซึ่งเมื่อใช้งานครบตามจำนวนก็จะเจอข้อความแบบนี้แทน
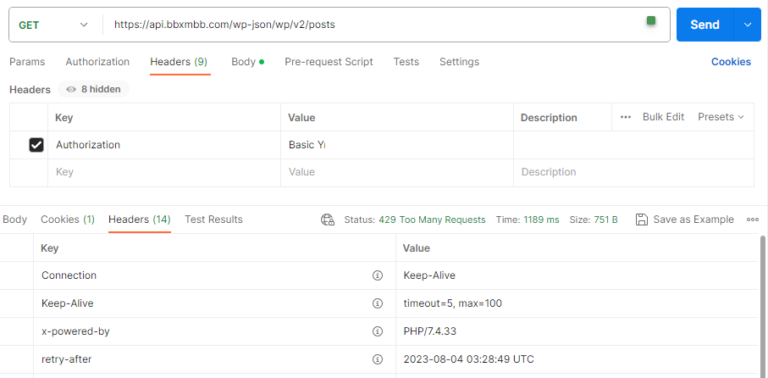
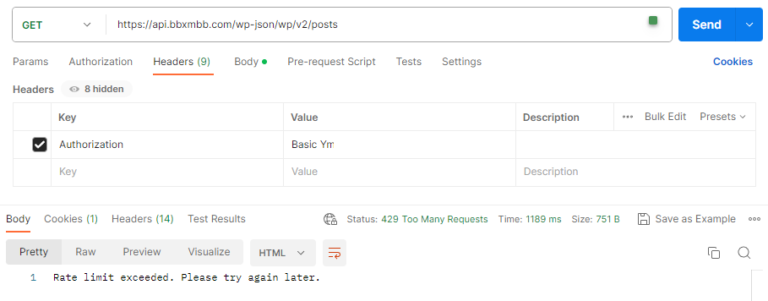
อย่างไรก็ดี max request limit ก็จะถูก reset ทุก 10 วินาทีตามที่เราได้ตั้งเอาไว้นั้นเอง
เช่นเดียวกันกับ post,put และ delete method ก็จะถูกจำกัดการใช้งานด้วยเช่นกัน เป็นอันเสร็จเรียบร้อย
ตั้งค่าเพื่อให้ผู้อื่นสามารถใช้งาน REST API with wordpress ที่เราสร้าง
เพื่อให้คนอื่นสามาถใช้งาน API ที่เราสร้างขึ้นมาได้ เราก็
- เปิดให้คนภายนอกสามารถสมัครมาที่ wordpress ของเราได้
- ให้ผู้ใช้งาน ไปแปลง username และ password ให้ออยู่ใน Format ของ Base64 Encoding โดยสามารถใช้ เว็บนี้ในการแปลงได้เช่นกัน โดนให้ใส่ username:password และนำ result มาใช้งานได้เลย
- https://www.base64encode.org/
- หากต้องการให้คนที่สมัครสามารถสร้าง,แก้ไขและลบ ได้ ต้องเปลี่ยน User-role จาก Subscriber เป็น Contributor
เพียงเท่านี้เราก็ได้สร้าง REST API เอาไว้ใช้เรียบร้อย โดยที่ไม่ต้องสร้างขึ้นมาใหม่ทั้งหมด โดยเอาไว้ใช้กับโปรเจคที่ไม่ได้ซับซ้อนและเงื่อนไขเยอะได้แล้ว เช่นเอามาทำเป็น api สำหรับดึงข้อมูลสภาพอากาศ เป็นต้น
หากท่านใดต้องการสร้าง REST API ไว้ใช้งาน เพื่อเชื่อมต่อกับแอพพลิเคชั่นภายนอก สามารถให้เราช่วยสร้างให้ได้